How to Enable Database Backup in CloudStick
Overview
Regular database backups are the foundation of a reliable disaster recovery strategy. Whether you're running a production application or a staging environment, losing your database can mean hours — or days — of downtime. CloudStick makes it simple to enable automated backups for any MySQL database with just a few clicks, directly from your server dashboard.
This guide walks you through navigating to your database, enabling the backup service, configuring the backup schedule, and setting the retention period to match your needs.
Before you begin, make sure your server is connected and the database you want to back up is already created in CloudStick.
Step 1: Navigate to Your Database
Start from the CloudStick dashboard to locate the server and database you want to protect.
1. Log in to CloudStick: Open your CloudStick dashboard and sign in with your credentials.
2. Select your server: From the dashboard, click on the server that hosts the database you wish to back up.
3. Open the Databases section: In the server management panel, click on "Databases" in the left-hand navigation menu.
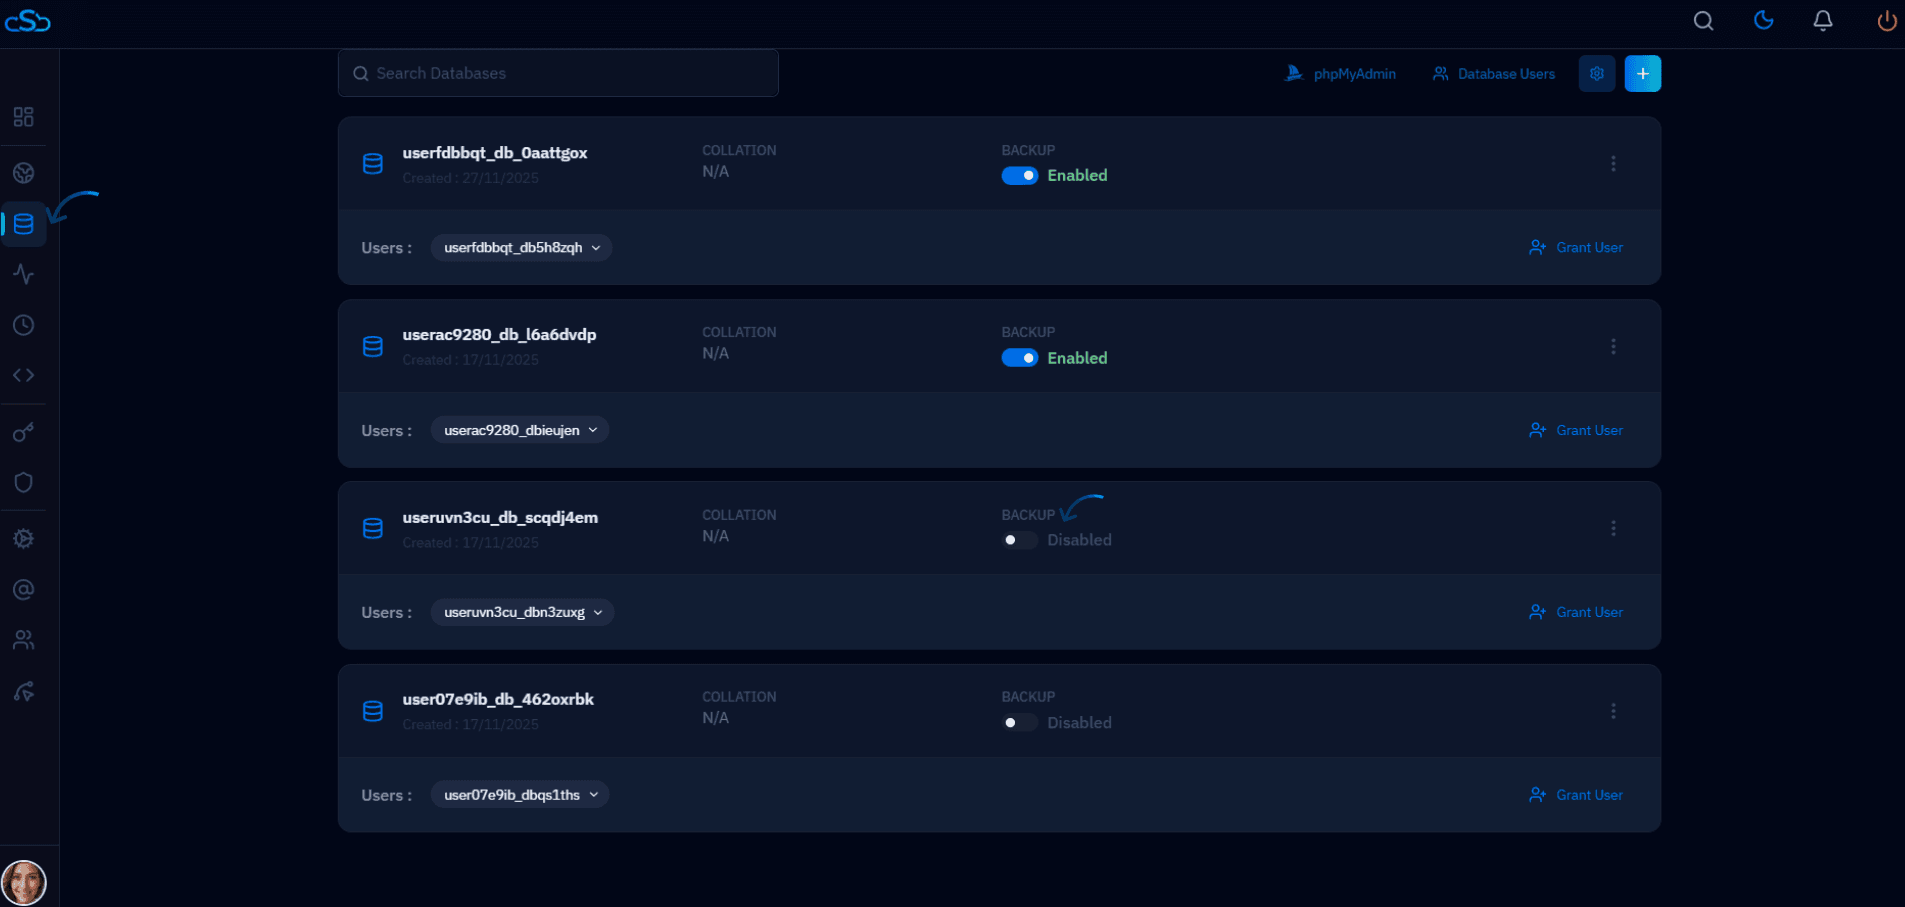
Fig. 01 — Server management panel with the Databases section highlighted in the navigation.
4. Locate the target database: Find the database in the list. Each entry displays its name, size, and current status.
Step 2: Enable Database Backup
Once you have located the database, enabling the backup service takes a single click.
1. Click "Enable Backup": On the database row or detail page, click the "Enable Backup" button. CloudStick will activate the backup service for this database immediately.
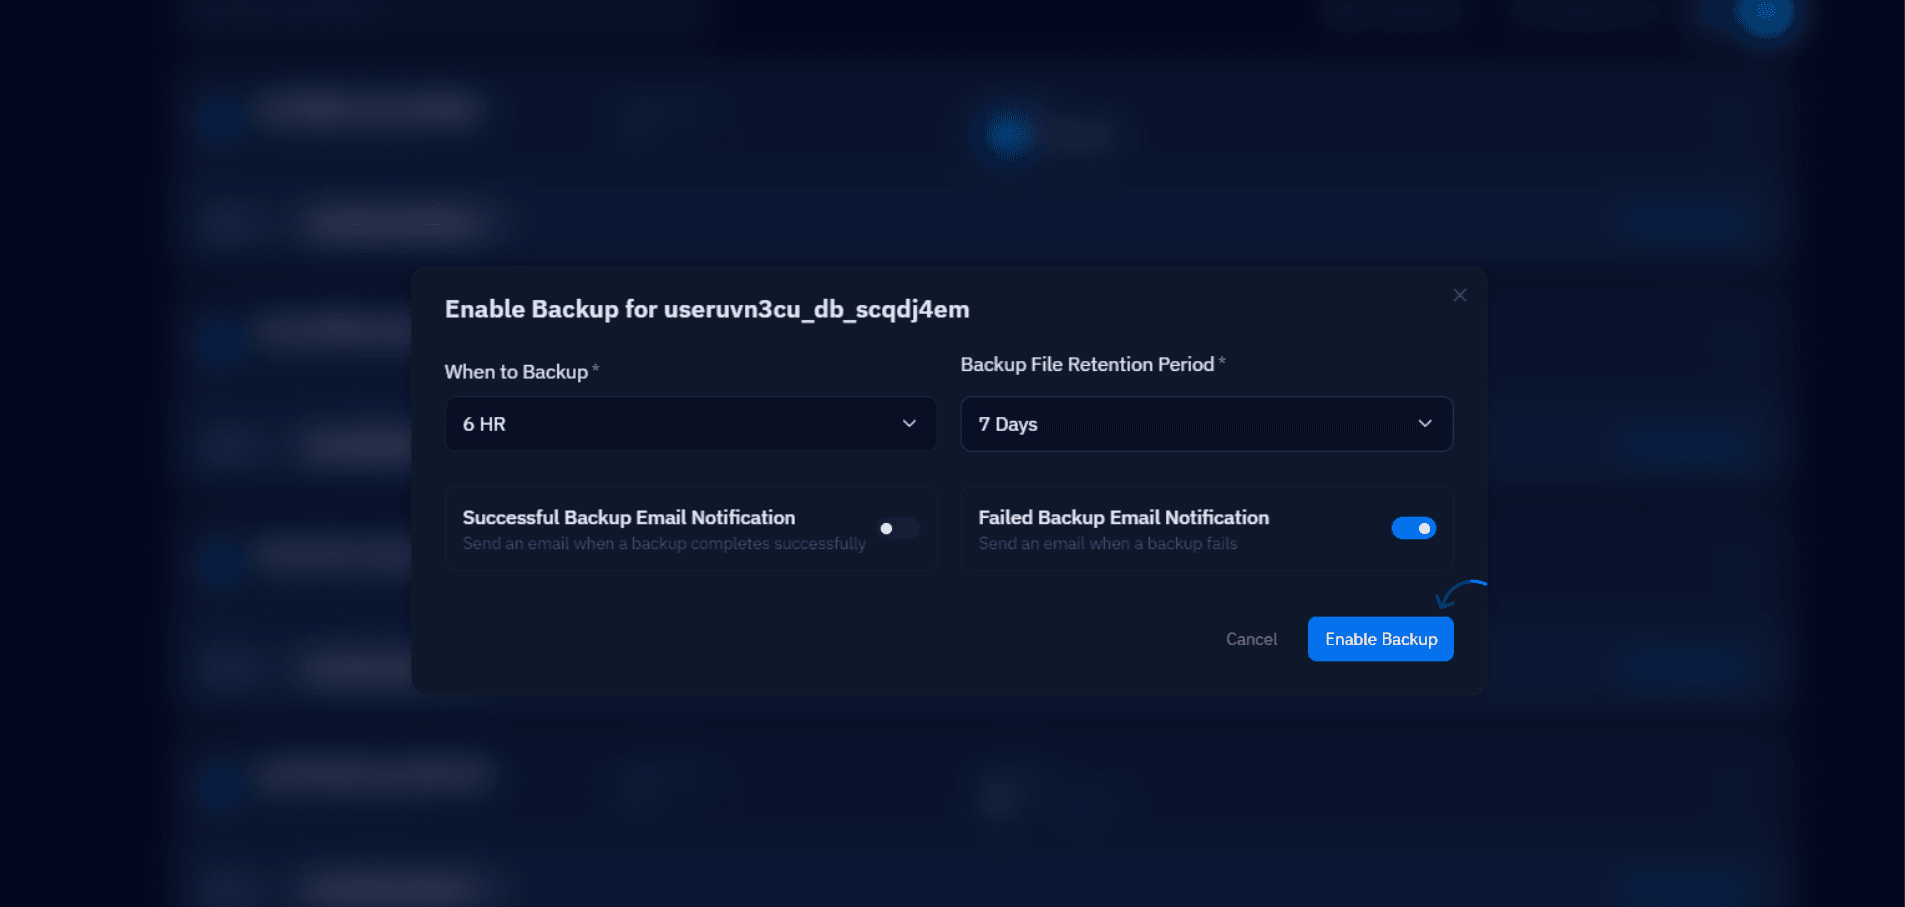
Fig. 02 — Database listing with the Enable Backup action visible for the selected database.
Once enabled, CloudStick will display a confirmation message and the backup status will update to Active. You can verify this from the same Databases view.
Step 3: Configure Backup Schedule and Retention
After enabling the backup, CloudStick prompts you to configure two important settings that control when backups are created and how long they are kept.
1. Set the Backup Schedule
Choose how frequently CloudStick should create a backup snapshot of your database:
Daily — recommended for production databases with frequent data changes.
Weekly — suitable for staging or development databases with low activity.
Custom schedule — define your own interval based on your application's specific needs.
2. Set the Retention Period
The retention period defines how long backup files are stored before CloudStick automatically deletes them to free up storage. Common options include 7 days, 14 days, or 30 days. Choose a period that balances your storage costs with your recovery requirements.
3. Save your settings: Click "Enable Backup" to confirm and activate the configured backup schedule and retention policy.
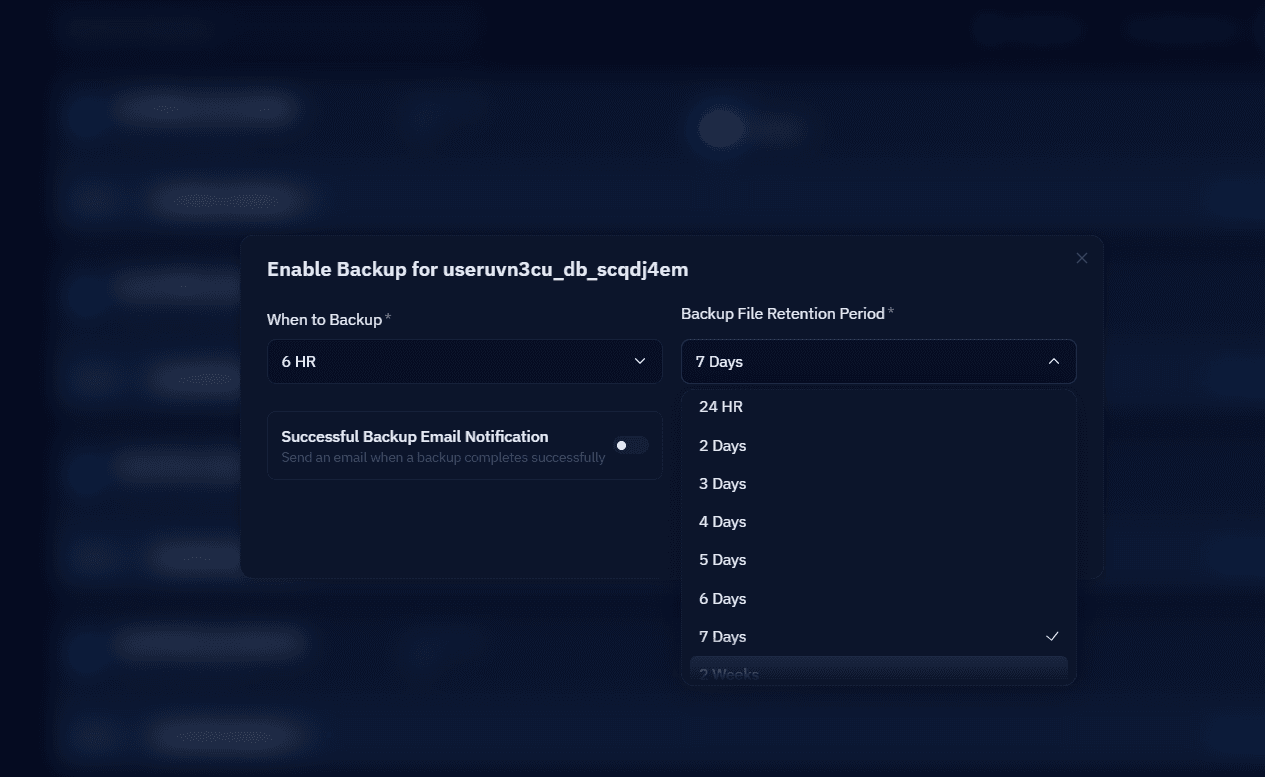
Fig. 03 — Backup configuration panel showing schedule selection and retention period settings.
Longer retention periods consume more disk space. Monitor your server's storage usage regularly to avoid running out of space, especially on databases with large datasets.