How to Download a Database Backup to Localhost
Overview
CloudStick stores backup snapshots of your databases automatically once backups are enabled. Being able to download these files to your local machine is essential for offline storage, migration to another server, or restoring data in a local development environment.
This guide walks you through locating your database backups in CloudStick, identifying the right snapshot by date and time, and downloading it directly to your localhost with a single click.
Database backups must be enabled before any snapshots are available to download. If you haven't enabled backups yet, refer to the How to Enable Database Backup guide first.
Step 1: Navigate to Database Backups
Start by logging in and opening the Backups section of the server that contains the database you want to download.
1. Log in to CloudStick: Open the CloudStick Dashboard and sign in with your credentials.
2. Open the Backups section: From the left-hand navigation menu of your server panel, click on "Backups".
3. Go to Database Backups: Within the Backups page, locate and open the Database Backups section. This lists all databases for which backup has been enabled.
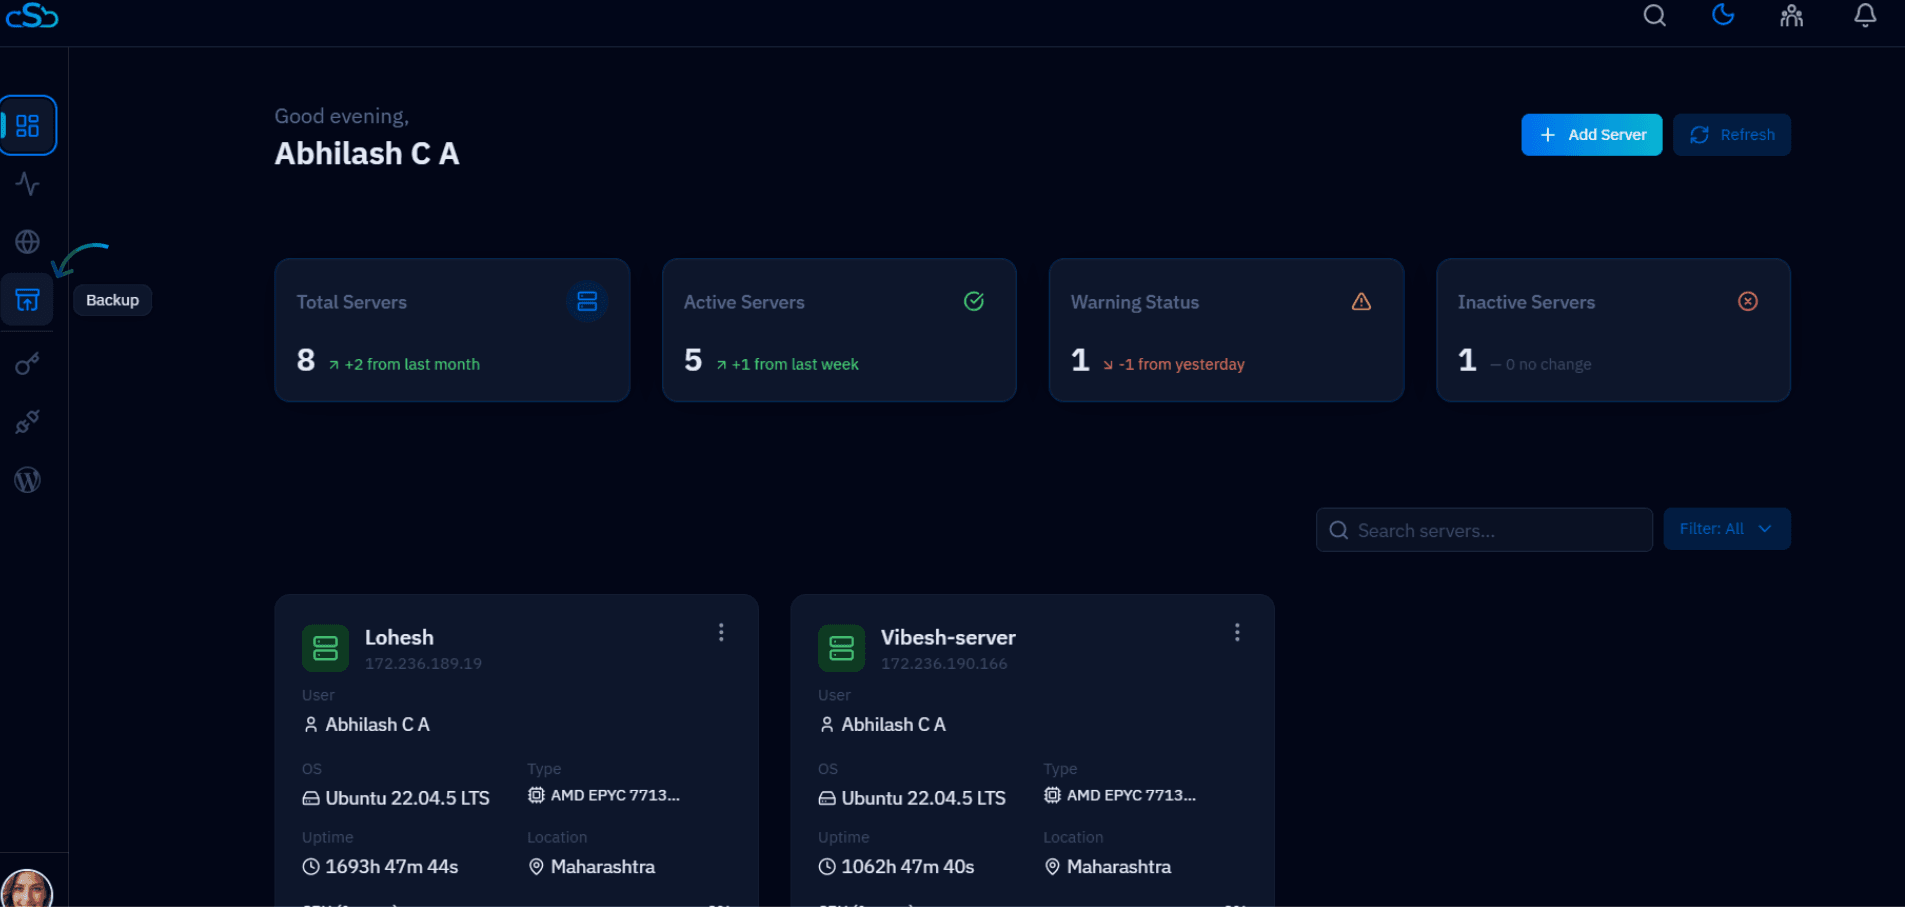
Fig. 01 — Backups page showing the Database Backups section with a list of backup-enabled databases.
Only databases with backup enabled will appear in this list. If your database is not shown, enable its backup first from the Databases section of your server.
Step 2: Select Your Database
With the list of backup-enabled databases in view, locate the specific database whose backup you want to download and open its detail view.
1. Identify your database: Scan the list to find the database you need. Each entry shows the database name and its current backup status.
2. Click the View icon: Click the eye (View) icon next to the required database. This opens the backup file list for that specific database, showing all available snapshots.
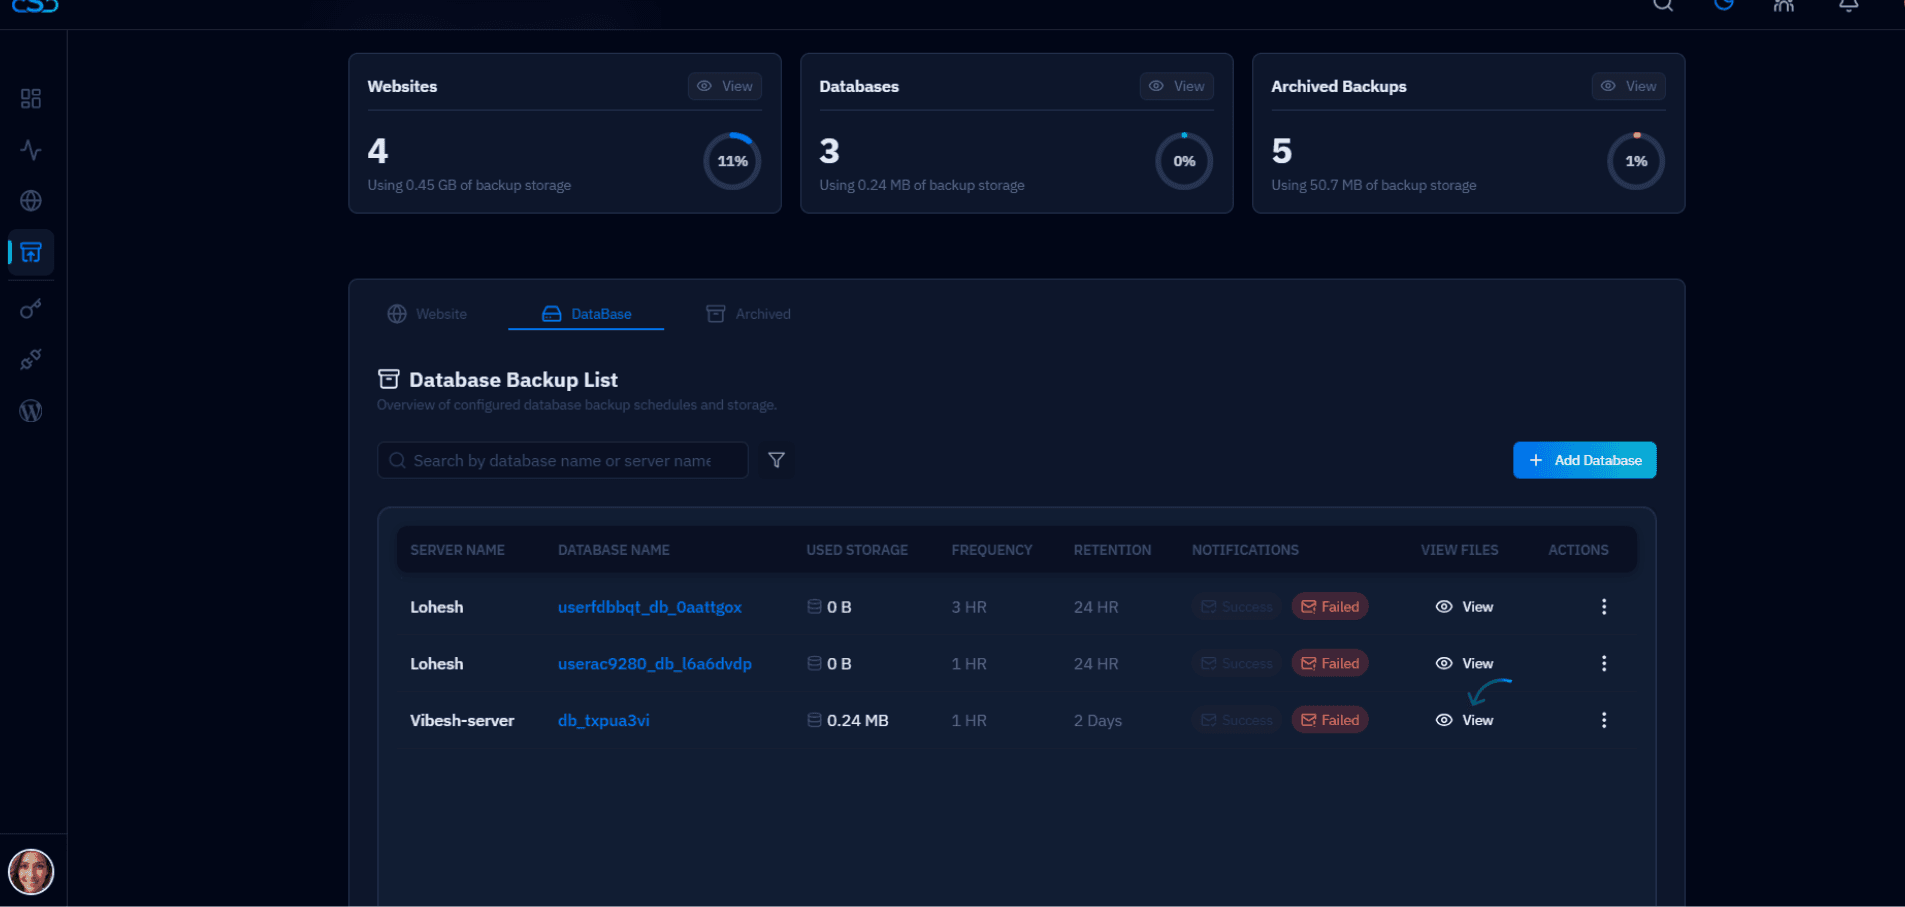
Fig. 02 — Database Backups list with the View (eye) icon highlighted next to a backup-enabled database.
After clicking View, you will see a chronological list of all backup snapshots for that database — each entry includes the snapshot date, time, and file size, making it easy to identify the exact restore point you need.
Step 3: Download a Backup File
With the backup file list open, you can download any snapshot to your local machine. CloudStick allows you to choose any available backup based on the date and time it was created.
Choosing the Right Backup
Before downloading, identify the snapshot that matches your recovery or migration needs:
Latest backup — use the most recent snapshot for day-to-day restores or migrations.
Date-specific backup — select an older snapshot if you need to roll back to a known-good state before an issue occurred.
Downloading the File
1. Locate the snapshot: In the backup file list, find the entry matching your required date and time.
2. Click Download: Click the "Download" button next to the snapshot. The backup file will begin downloading to your local machine immediately.
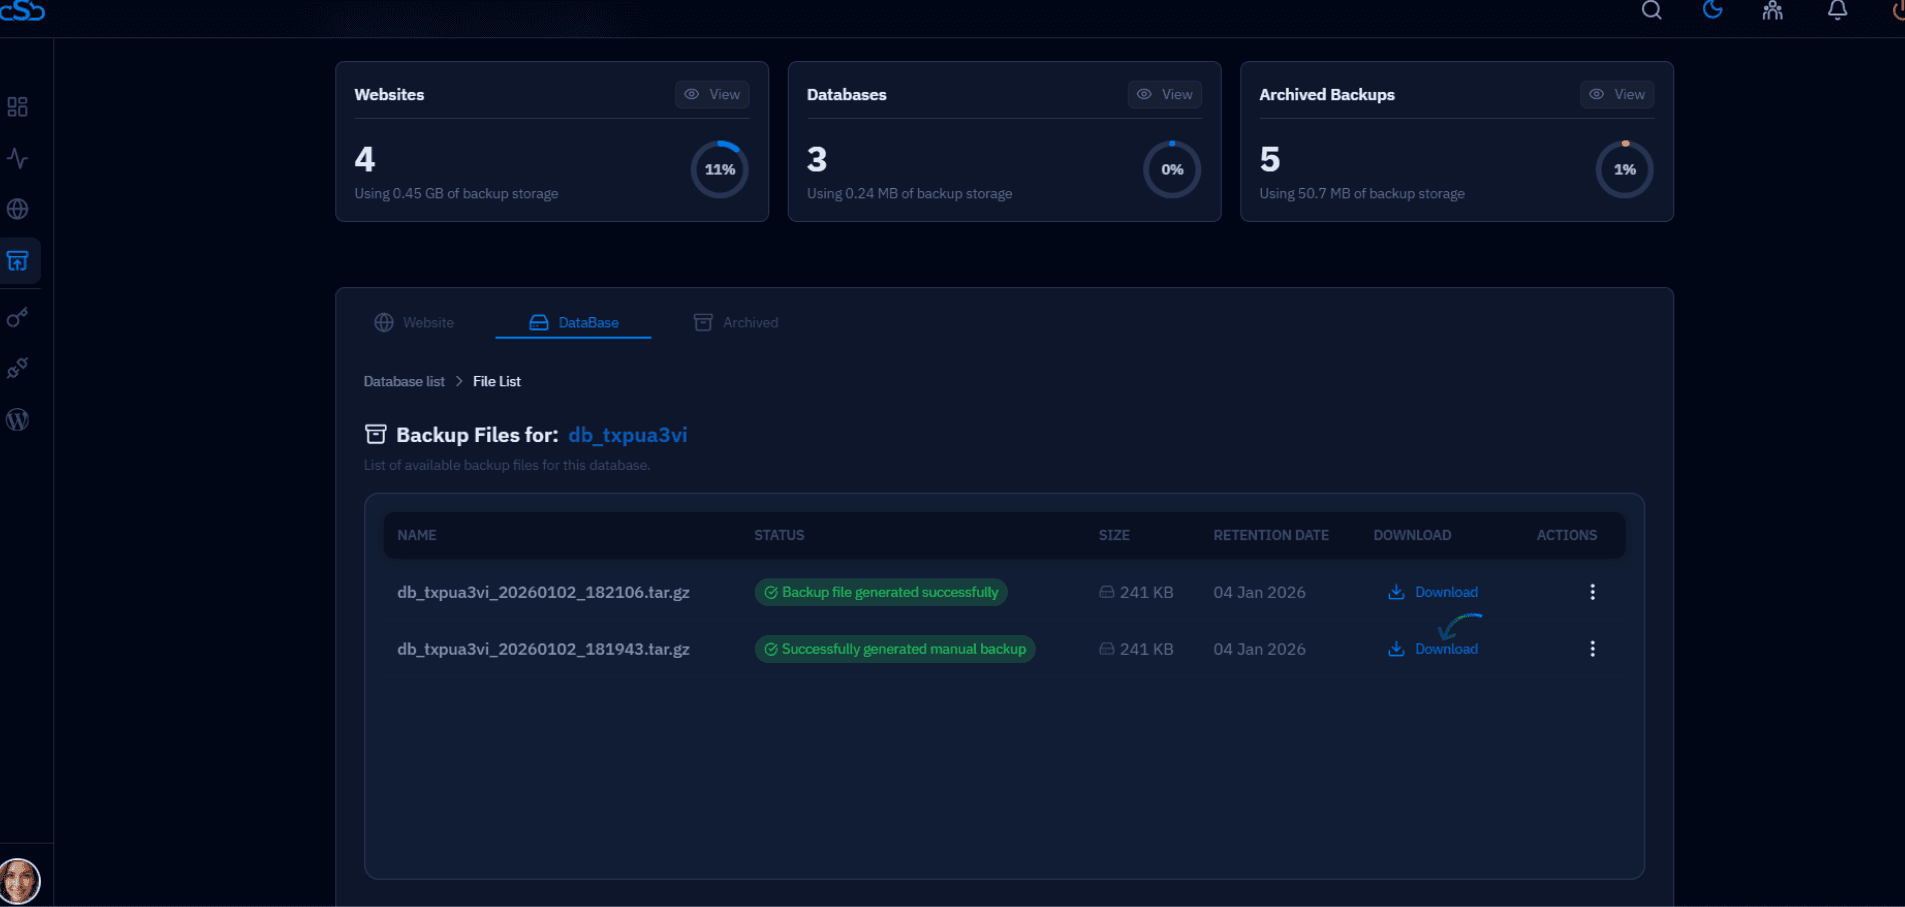
Fig. 03 — Backup file list with date, time, and the Download button for each available snapshot.
The downloaded file is a compressed database dump. To restore it locally, import it using your preferred database client (e.g. phpMyAdmin, TablePlus, or the MySQL CLI with mysql -u root -p dbname < backup.sql).